Difference between revisions of "Import Workforce"
| Line 53: | Line 53: | ||
Continue to: [[Import Adverse Impact]] | Continue to: [[Import Adverse Impact]] | ||
| + | |||
| + | © Copyright Yocom & McKee, Inc. | ||
Revision as of 20:19, 1 August 2011
Follow the Import instructions on this page to import your workforce.
![]() Pro users, please remember that you may include workforce data for all plans in one company in the same import file.
Pro users, please remember that you may include workforce data for all plans in one company in the same import file.
1) Open the plan you wish to work in.
2) Click the Import icon.
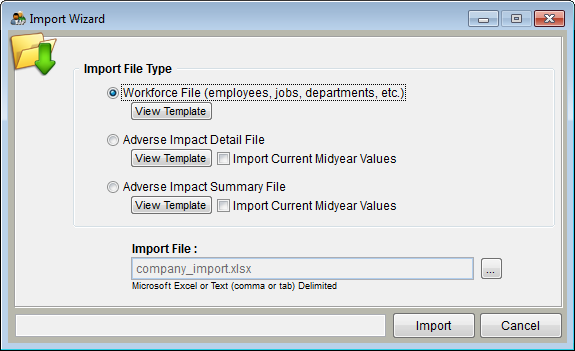
3) Click the Workforce File button if it is not selected.
4) If the correct file is not shown in the Import File path you may locate your file by typing the path where your file is stored; or by clicking the ![]() button to locate and select your file.
button to locate and select your file.
5) After you select the file, its path will appear in the Import File box.
6) Click Import.
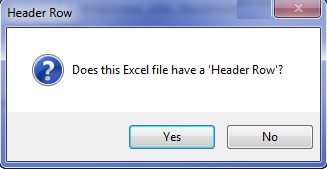
7) When the following message appears click Yes if your file has a header row.
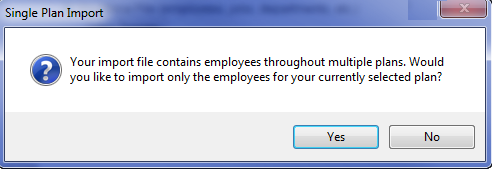
![]() 8) This step applies to the Pro version only. If your workforce import file has multiple plan or location codes and if you are not in all plans you will get the message shown below.
8) This step applies to the Pro version only. If your workforce import file has multiple plan or location codes and if you are not in all plans you will get the message shown below.
- Click No to import all plans and/or locations.
- Click Yes if you wish to import data for only the plan you have open.
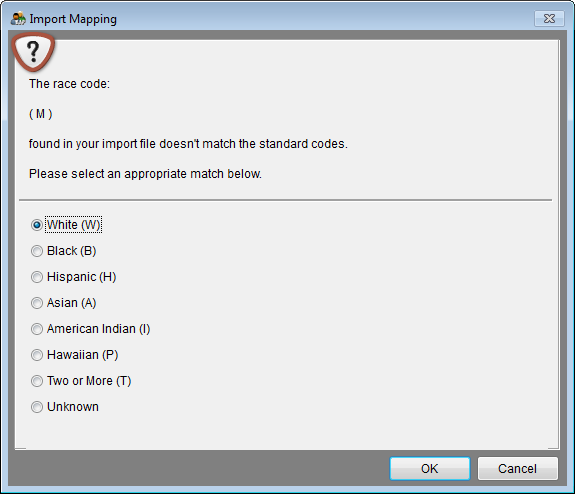
9) The software may ask you to clarify some information if it does not recognize the codes you used. You will need to read and respond to each window as it appears. An example is shown below.
- a) Read the statement.
- b) Select the appropriate entry in the category.
- c) Click OK.
10) If the software asks you to clarify information that does not seem to correspond with the information shown at bottom, you will need to Cancel your import and correct your import file. For example, if “M” for “Male” is shown in the box at top, but race information is shown at bottom, the import file has race data in the gender column. After correcting your import file start the import process again.
11) When the import is complete you will be taken to the Select A Plan window.
![]() If you have small plans that need to be rolled into a larger plan we recommend performing the roll up at this time.
If you have small plans that need to be rolled into a larger plan we recommend performing the roll up at this time.
- a) Click Utilities and then Roll Up Plans.
- b) Set Minimum plan size if you want a different threshold than 50.
- c) Click OK.
- d) Click Open Plan to confirm that all small plans were rolled up.
- e) If employees remain in a small plan check the employee data for missing or incorrect supervisor information. Correct the supervisor information and follow steps 1-9.
Continue to: Import Adverse Impact
© Copyright Yocom & McKee, Inc.


