Difference between revisions of "Eliminate Job Group Errors"
(Created page with "==Correcting Errors & Virtual Job Groups== The only items that will cause errors in the Job Group table are: * Missing Job Group Codes * Missing Job Group Names * Missing Local ...") |
|||
| Line 12: | Line 12: | ||
1) Click the Job Groups icon. | 1) Click the Job Groups icon. | ||
| − | + | [[File:Job Groups Icon.png]] | |
2) Type missing Job Group Codes. | 2) Type missing Job Group Codes. | ||
| Line 18: | Line 18: | ||
3) Type missing Job Group Names. | 3) Type missing Job Group Names. | ||
| − | 4) Fix typos or mistakes: | + | 4) Fix typos or mistakes:<br> |
| − | a) Select the text that you want to change. | + | :a) Select the text that you want to change.<br> |
| − | b) Type the correct text. | + | :b) Type the correct text. |
| − | 5) Delete blank records: | + | 5) Delete blank records:<br> |
| − | a) Select Tools and then Remove Unused Job Groups. | + | :a) Select Tools and then Remove Unused Job Groups.<br> |
| − | b) If Job Groups remain that you believe are unused you will need to go to the Jobs icon, remove unused jobs, return to Job Groups and repeat step 5a. | + | :b) If Job Groups remain that you believe are unused you will need to go to the Jobs icon, remove unused jobs, return to Job Groups and repeat step 5a. |
| − | + | [[File:DeleteUnusedJGs.png]] | |
6) To add a single job group, click Add then type a job group code and its title. | 6) To add a single job group, click Add then type a job group code and its title. | ||
| − | + | [[File:ProTag.jpg]] If working with all plans, Pro users should also type the plan code of the Job Group. | |
| − | 7) Assign weight to your recruiting factors and determine availability using the steps outlined on the: | + | 7) Assign weight to your recruiting factors and determine availability using the steps outlined on the: [[Assign Weight to Your Recruiting Factors]] page. |
| − | 8) Assign Local and Non-Local census areas using the steps outlined on the | + | 8) Assign Local and Non-Local census areas using the steps outlined on the [[Factors 1a and 1b|Assign Census Areas]] page. |
9) To delete a single job group, select the job group then click Delete. Confirm deletion. Reassign jobs if necessary. | 9) To delete a single job group, select the job group then click Delete. Confirm deletion. Reassign jobs if necessary. | ||
| Line 40: | Line 40: | ||
===Virtual Job Groups=== | ===Virtual Job Groups=== | ||
| − | + | [[File:ProTag.jpg]] The Complete AAP automatically generates new job groups in a plan when jobs from other plans are rolled up and their job groups do not exist in the receiving plan. The most obvious indicator of a virtual job group is a job group code and job group name in the Availability Analysis with brackets around it. There are two ways to eliminate virtual job groups from your reports. | |
| − | 1) Follow the procedures listed below if you wish to create a new job group with the associated recruitment information. | + | 1) Follow the procedures listed below if you wish to create a new job group with the associated recruitment information.<br> |
| − | a) Click the Job Groups icon. | + | :a) Click the Job Groups icon.<br> |
| − | b) Click Tools and then Add In Job Groups From Other Plans. | + | :b) Click Tools and then Add In Job Groups From Other Plans.<br> |
| − | c) Click Yes on the message that appears. | + | :c) Click Yes on the message that appears. |
| − | + | [[File:Job Groups - add from other plans.png]] | |
| − | 2) You may choose to assign the job to an existing job group. | + | 2) You may choose to assign the job to an existing job group.<br> |
| − | a) Click the Jobs icon. | + | :a) Click the Jobs icon.<br> |
| − | b) If the job is not in the job list, click Tools and then Import Jobs from Employees Reporting In To This Plan. | + | :b) If the job is not in the job list, click Tools and then Import Jobs from Employees Reporting In To This Plan.<br> |
| − | c) Click Yes when the following message appears. | + | :c) Click Yes when the following message appears. |
| − | + | [[File:BringJobsIn.png]] | |
| − | d) Assign the job to an existing job group. | + | :d) Assign the job to an existing job group. |
| + | |||
| + | © Copyright Yocom & McKee, Inc. | ||
Revision as of 22:08, 9 August 2011
Correcting Errors & Virtual Job Groups
The only items that will cause errors in the Job Group table are:
- Missing Job Group Codes
- Missing Job Group Names
- Missing Local Census Area
- Missing Non-Local Census Area
- Missing Weight
- Weights not totaling 100%
1) Click the Job Groups icon.
2) Type missing Job Group Codes.
3) Type missing Job Group Names.
4) Fix typos or mistakes:
- a) Select the text that you want to change.
- b) Type the correct text.
5) Delete blank records:
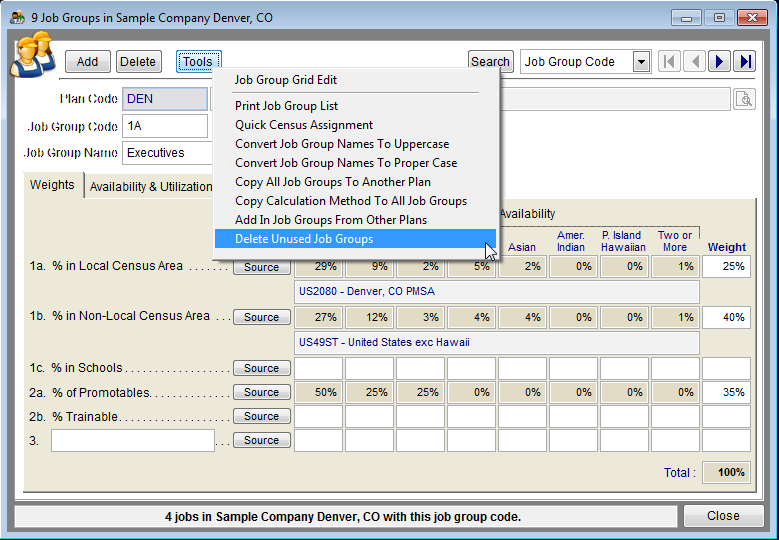
- a) Select Tools and then Remove Unused Job Groups.
- b) If Job Groups remain that you believe are unused you will need to go to the Jobs icon, remove unused jobs, return to Job Groups and repeat step 5a.
6) To add a single job group, click Add then type a job group code and its title.
![]() If working with all plans, Pro users should also type the plan code of the Job Group.
If working with all plans, Pro users should also type the plan code of the Job Group.
7) Assign weight to your recruiting factors and determine availability using the steps outlined on the: Assign Weight to Your Recruiting Factors page.
8) Assign Local and Non-Local census areas using the steps outlined on the Assign Census Areas page.
9) To delete a single job group, select the job group then click Delete. Confirm deletion. Reassign jobs if necessary.
Virtual Job Groups
![]() The Complete AAP automatically generates new job groups in a plan when jobs from other plans are rolled up and their job groups do not exist in the receiving plan. The most obvious indicator of a virtual job group is a job group code and job group name in the Availability Analysis with brackets around it. There are two ways to eliminate virtual job groups from your reports.
The Complete AAP automatically generates new job groups in a plan when jobs from other plans are rolled up and their job groups do not exist in the receiving plan. The most obvious indicator of a virtual job group is a job group code and job group name in the Availability Analysis with brackets around it. There are two ways to eliminate virtual job groups from your reports.
1) Follow the procedures listed below if you wish to create a new job group with the associated recruitment information.
- a) Click the Job Groups icon.
- b) Click Tools and then Add In Job Groups From Other Plans.
- c) Click Yes on the message that appears.
2) You may choose to assign the job to an existing job group.
- a) Click the Jobs icon.
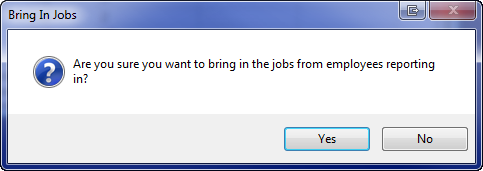
- b) If the job is not in the job list, click Tools and then Import Jobs from Employees Reporting In To This Plan.
- c) Click Yes when the following message appears.
- d) Assign the job to an existing job group.
© Copyright Yocom & McKee, Inc.


