Difference between revisions of "Additional Reporting Issues In Employee Window"
| Line 67: | Line 67: | ||
[[File:Excludedemployee.png]] | [[File:Excludedemployee.png]] | ||
| − | + | Proceed to | |
==See Also== | ==See Also== | ||
[[Annotations]]<br> | [[Annotations]]<br> | ||
Revision as of 16:30, 28 September 2012
User-Defined Fields
User-Defined fields are used exclusively for Salary Regression Analyses. These fields can be input manually, or can be imported with your initial workforce data. You can also import them later using an updated import file that includes any of these fields plus employee IDs.
There are various factors that can explain salary disparity. The software allows two date fields and three numeric fields. User-defined date fields that are often used include:
- Date of most current job
- Date of last increase
Hire date is also commonly used in the compensation reports and should be input or imported into the Hire Date field.
User-defined numeric fields that are used most often include:
- Performance Scores
- Education Level
- Years of experience
Performance scores and education levels must be assigned numeric values before they are input or imported.The following is an example of numeric conversion:
- 1 = No high school diploma.
- 2 = High school diploma.
- 3 = Associate’s degree.
- 4 = Bachelor’s degree.
- 5 = Master’s degree.
- 6 = Ph.D.
NOTE: Do not use zero as a numeric value because the program will treat zeros as blanks which are not used in the calculations.
When you access the Employees window, you might find that user-defined fields are not visible. Close open windows within The Complete AAP and then follow these steps to activate the user-defined fields:
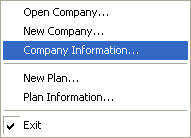
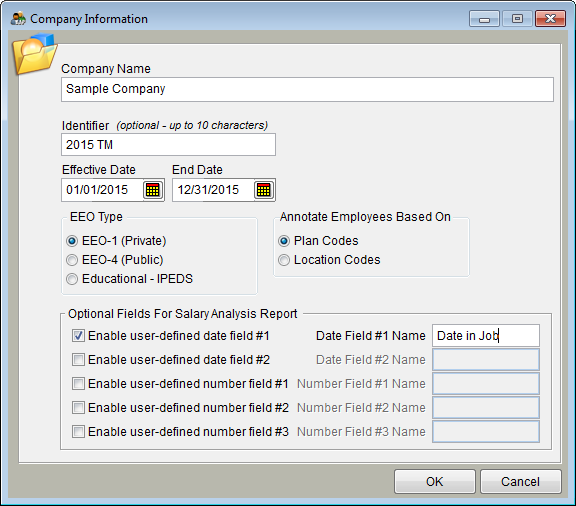
- 1) Click File and then Company Information.
- 2) Enable fields by clicking the appropriate Optional Fields For Salary Analysis Report boxes.
- 3) Type names for your fields.
- 4) Click OK and return to the Employees window to edit or add the user-defined data.
Annotations
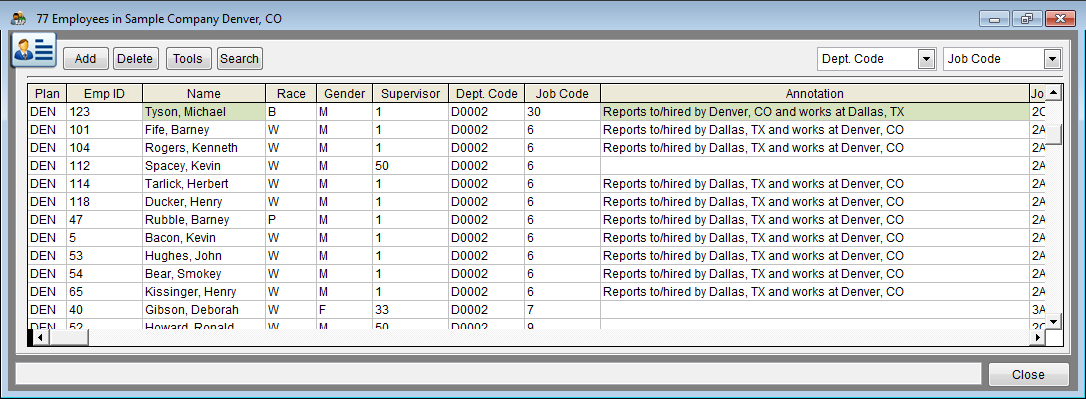
Regulations require that employees who work at one facility but report to a manager at a facility that is covered under a different affirmative action plan (AAP) be annotated in both AAPs, and be included only in the statistics of the AAP that covers their managers’ work location. An “annotation” is a notation that indicates an employee’s reporting and work location. Both versions of The Complete AAP can automatically create an annotation for each employee who has a different location code than their supervisor. The Complete AAP Pro can alternatively create an automatic annotation for each employee who has a different plan code than their supervisor, depending on the selection made on the Company Information window (found in the File menu). In addition to automatically annotating a record, The Complete AAP Pro will also exclude an employee’s record from his or her work location’s AAP statistics and include the record in his or her reporting location’s AAP statistics.
To manually add or edit an annotation:
1) Search for and select the record of the employee that you wish to annotate.
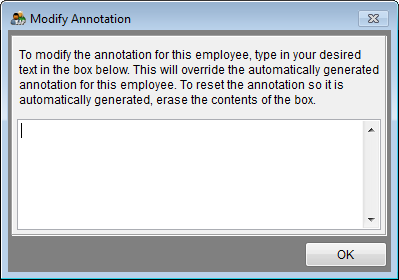
2) Add or edit an annotation by clicking on the button at the right side of the annotation box and typing text. Click OK.
3) You may manually exclude an employee from the current AAP by following the steps below.
![]() Note: The Pro version automatically excludes or includes employees based on their managers’ information.
Note: The Pro version automatically excludes or includes employees based on their managers’ information.
- a) Search for and select the record of the employee you wish to exclude.
- b) Select Tools and then Manually Exclude This Employee From This Plan. The Name box will become shaded.
Proceed to
See Also
Annotations
Employee Grid Edit
Employee Single Record Edit
© Copyright Yocom & McKee, Inc.


