Step-By-Step Guide
This guide will show you how to create an example custom document that has an Annual Goals report within it that has options that differ from the default options. In this scenario, we are assuming that the user wants to always have the ability to quickly publish a modified Annual Goals report with their custom options. Both a custom document and a custom section will be created. This example could be expanded on by creating multiple custom sections.
Step 1
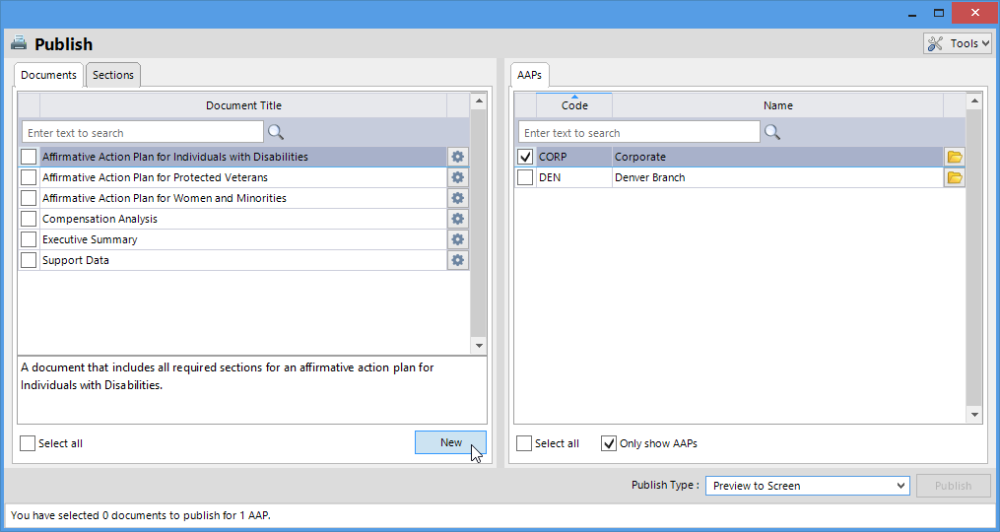
Open the Publish window from the main toolbar. On the Documents tab, click the New button (as shown in the image above).
Step 2
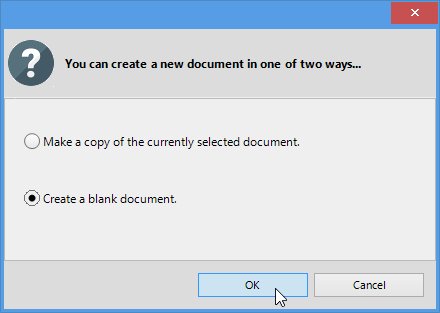
A small dialog window will appear that asks how you would like to create the document. Choose the “Create a blank document” option and then click the OK button.
Step 3
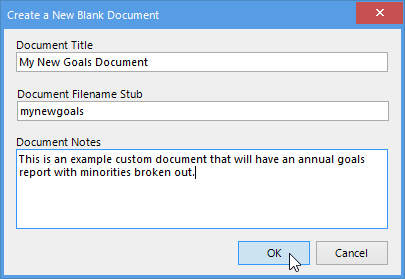
A “Create a New Blank Document” window will appear. In this example, we have filled in all three fields.
The “Document Title” will be the name of the document that will be visible in the Documents tab of the Publish window.
The “Document Filename Stub” is the filename that will be used if you’d like to publish the document to a digital format. In the example above, we’ve typed in “mynewgoals”. If you were to publish this document to a PDF, the file on disk would be called “mynewgoals.pdf”.
The “Document Notes” are optional. This serves as a general description of your custom document. It will display on the Publish window when the new custom document is selected.
After filling in the fields, click on the OK button.
Step 4
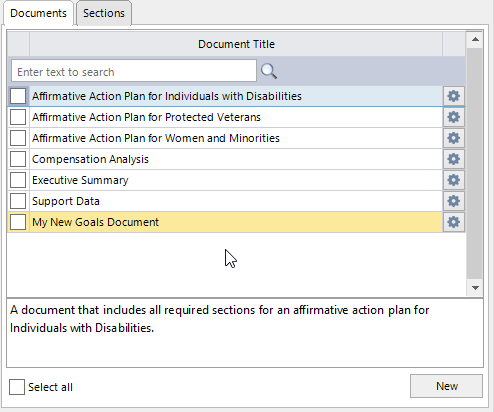
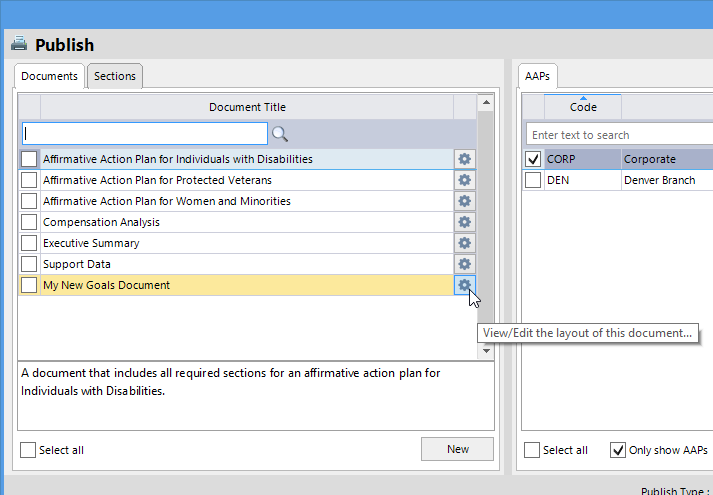
A new blank document called “My New Goals Document” has been created. It is displayed in a yellow-orange color that indicates that this is a custom document (not created by Yocom and McKee, Inc.). There are no sections in this document yet. Lets move on and create a custom section to place in the newly created document.
Step 5
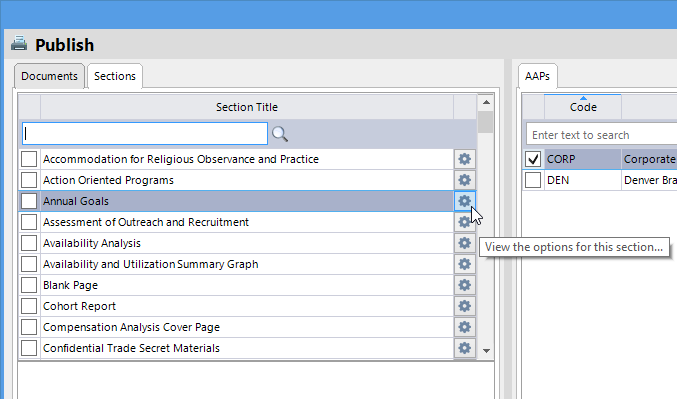
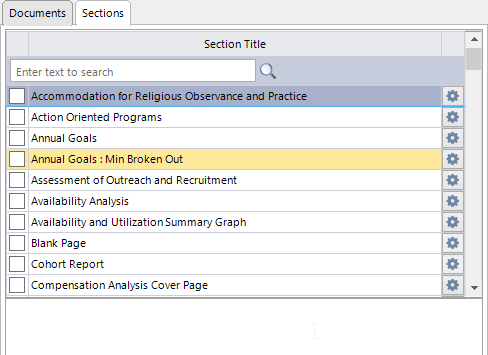
Click on the “Sections” tab of the Publish window. In the section list, there will be a section called “Annual Goals”. To the right of that section, there is a gear icon (as seen in the image above). Click on the gear icon so we can view the options for the section.
Step 6
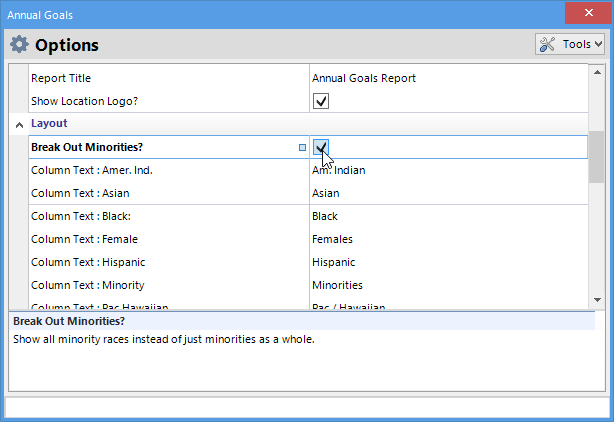
An Annual Goals Options window will display. Scroll down in the list of options until you see “Break Out Minorities?”. Normally the report is shown with minorities grouped together as a whole, but in this example, we want to have an Annual Goals report that shows all minorities broken out. Place a check in the “Break Out Minorities?” option.
Step 7
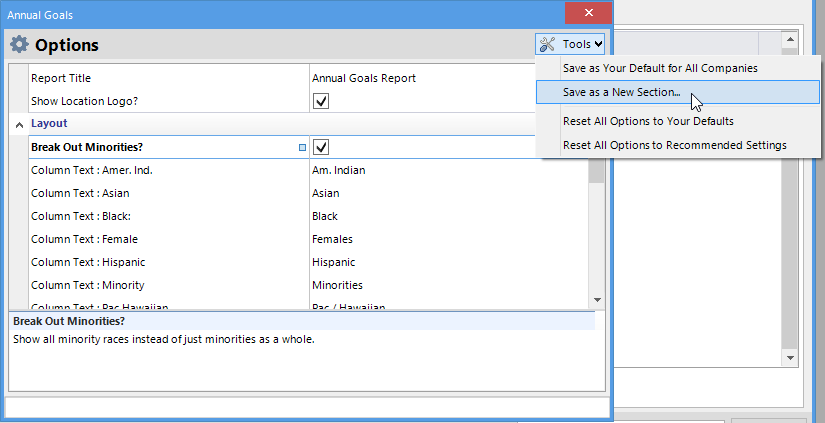
From the Tools button on the “Annual Goals Options” window, choose “Save as a New Section…”.
Step 8
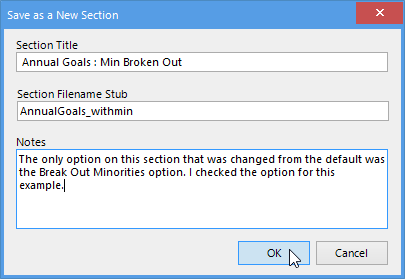
A “Save as a New Section” dialog window will appear. We’ve filled in all three fields in this example.
The “Section Title” field has been changed to briefly describe how this report differs from the regular Annual Goals report. This title will be shown in the sections list on the Publish window. It is recommended to keep the title rather short so it can be fully displayed in the list.
The “Section Filename Stub” has been changed slightly to “AnnualGoals_withmin”. If this section is ever published to a PDF (for example) separately from a document, the name of the created file would be “AnnualGoals_withmin.pdf”.
The “Notes” field describes what exactly what was changed in this report. This field is optional.
Click on the OK button to save this as a new section.
Step 9
The Publish window will appear again and a new custom section called “Annual Goals : Min Broken Out” will be visible in the section listing. It is highlighted in a yellow-orange color to indicate that this is a customized section (it differs from the Yocom and McKee, Inc. recommended settings).
Step 10
Click on the Documents tab within the Publish window. To the right of the previously created “My New Goals Document” there is a gear icon. Click on the gear icon so that we can add the new “Annual Goals : Min Broken Out” section to it.
Step 11
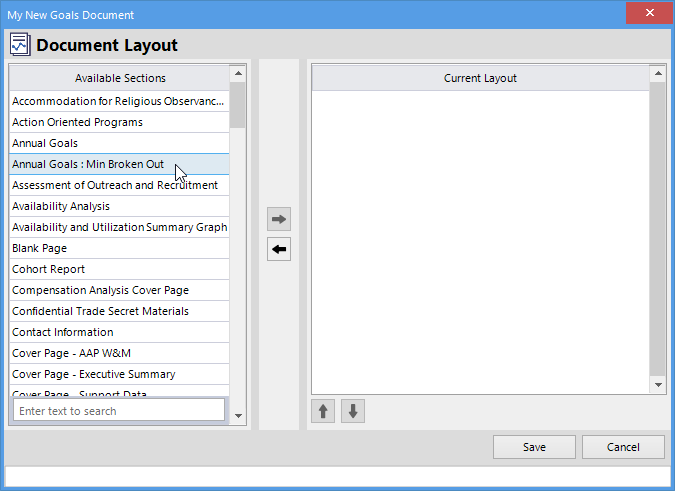
A “Document Layout” window will appear that will allow us to add sections to the “My New Goals” document. Verify that you see the section called “Annual Goals : Min Broken Out” that was created earlier.
Step 12
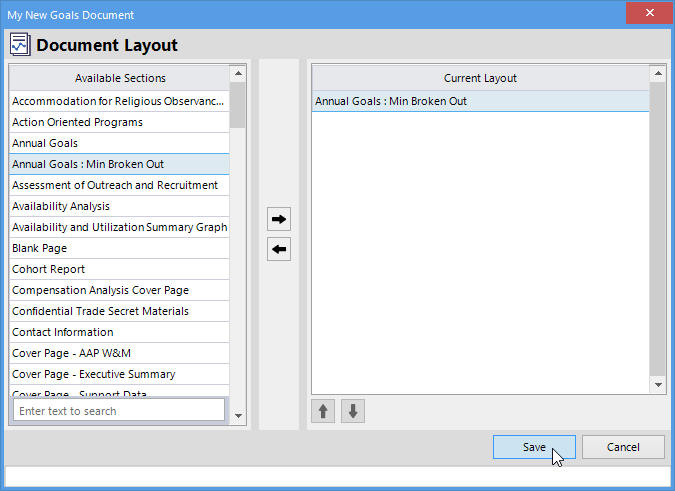
Double-click on the “Annual Goals : Min Broken Out” section to add it to the layout. It should appear in the “Current Layout” pane. In a real world situation, we would most likely be adding multiple sections here to publish for this document.
Step 13
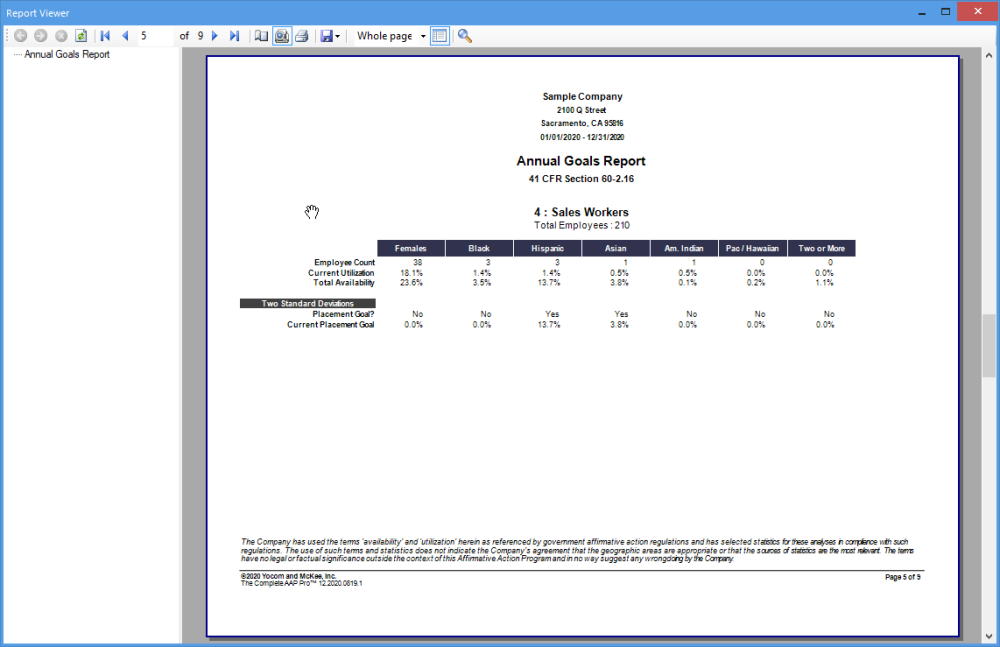
The new “My New Goals” document can now be published. There is only one section in this example document. The Annual Goals report should display with the minorities broken out.
Need more help with this?
The Complete AAP 12 Software Client Support Page

